Fanthom Store
Simple CRUD e-commerce web application using Laravel 10, Docker, Tailwind CSS, and Alpine JS
Share this project:
Project Overview
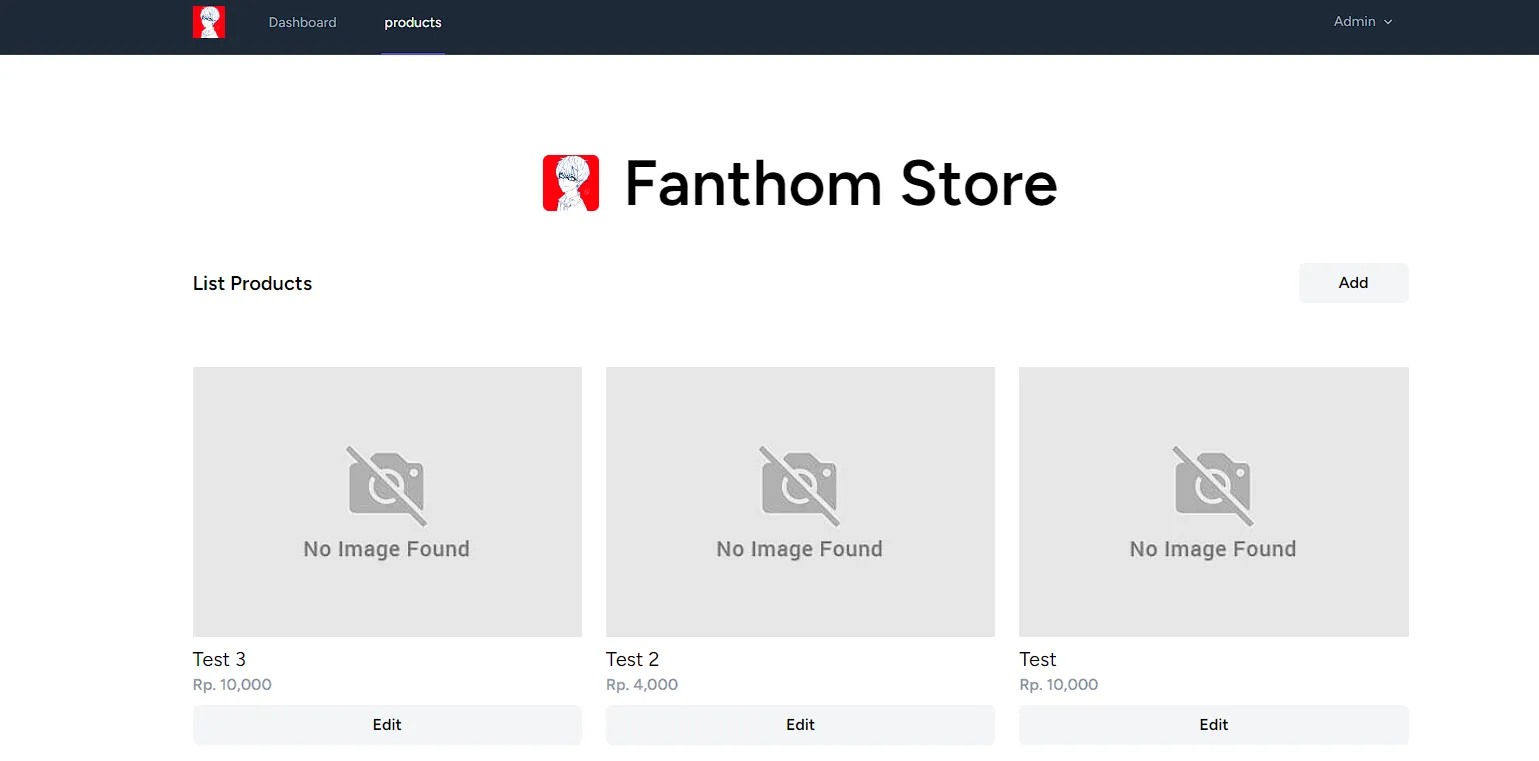
Fanthom Store
A modern CRUD-based e-commerce web application built with Laravel 10, running in a Dockerized environment. This project demonstrates full-stack development with Laravel Sail, featuring a sleek UI powered by Tailwind CSS and interactive components with Alpine.js.
📋 Overview
Fanthom Store is a learning project that showcases modern web development practices with Laravel 10 and Docker. Inspired by tokokita-laravel, this application provides a complete e-commerce solution with product management, shopping cart functionality, and a responsive user interface.
##✨ Features
-
Product Management (CRUD)
- Create new products with images
- Read and display products in catalog
- Update product information and inventory
- Delete products with confirmation
-
User Experience
- Responsive design for all devices
- Fast page loads with Vite
- Interactive UI with Alpine.js
- Beautiful styling with Tailwind CSS
-
Docker Integration
- Containerized development environment
- Laravel Sail for easy Docker management
- MySQL database container
- PhpMyAdmin for database administration
-
Modern Stack
- Laravel 10 backend framework
- Vite for asset bundling
- Livewire for reactive components
- Authentication system
🛠️ Tech Stack
| Technology | Purpose |
|---|---|
| Laravel 10 | PHP backend framework |
| Docker | Containerization platform |
| Laravel Sail | Docker development environment |
| MySQL | Relational database |
| PhpMyAdmin | Database management interface |
| Tailwind CSS | Utility-first CSS framework |
| Alpine.js | Lightweight JavaScript framework |
| Vite | Modern frontend build tool |
📁 Project Structure
fanthom-store/
├── app/
│   ├── Http/Controllers/          # Application controllers
│   ├── Models/                    # Eloquent models
│   └── Livewire/                 # Livewire components
├── database/
│   ├── migrations/               # Database migrations
│   └── seeders/                  # Database seeders
├── resources/
│   ├── views/                    # Blade templates
│   ├── css/                      # Tailwind CSS files
│   └── js/                       # JavaScript files
├── routes/
│   └── web.php                   # Web routes
├── public/                       # Public assets
├── docker-compose.yml            # Docker services config
├── Makefile                      # Command shortcuts
└── README.md
🚀 Getting Started
Prerequisites
- Docker Desktop - Must be running
- Unix-based Terminal - Linux/macOS terminal or WSL for Windows
- Git - For cloning the repository
- Make (optional) - For using Makefile commands
Installation Steps
-
Clone the Repository
git clone https://github.com/daffa09/fanthom-store.git cd fanthom-store -
Open in Your Code Editor
- Open the project in VS Code or your preferred editor
-
Rename Environment File
cp .env.example .env -
Start Docker Services
Using Makefile (recommended):
make db-startOr manually:
./vendor/bin/sail up -d -
Install Dependencies
Run the following commands in sequence:
# Install Composer dependencies make composer-install # Or: ./vendor/bin/sail composer install # Install NPM dependencies make npm-install # Or: ./vendor/bin/sail npm install -
Setup Database
# Run migrations make migrate # Or: ./vendor/bin/sail artisan migrate # Optional: Seed database with sample data make db-migrate # Or: ./vendor/bin/sail artisan db:seed -
Create Storage Link
make storage-link # Or: ./vendor/bin/sail artisan storage:link -
Build Frontend Assets
make npm-dev # Or: ./vendor/bin/sail npm run dev -
Start the Application
make run # Or: ./vendor/bin/sail up -
Access the Application
- Frontend:
http://localhost - PhpMyAdmin:
http://localhost:8080
- Frontend:
💻 Usage
Accessing PhpMyAdmin
- URL:
http://localhost:8080 - Server:
mysql - Username: As configured in
.env(default:sail) - Password: As configured in
.env(default:password)
Managing Products
-
Create Product
- Navigate to product creation page
- Fill in product details (name, description, price)
- Upload product image
- Submit form to save
-
View Products
- Browse the product catalog
- Filter and search products
- View product details
-
Update Product
- Click edit on desired product
- Modify product information
- Save changes
-
Delete Product
- Click delete button
- Confirm deletion
- Product is removed from database
Using Makefile Commands
The project includes a Makefile for common operations:
# Database operations
make db-start          # Start Docker services
make db-migrate        # Run migrations and seeders
make migrate           # Run migrations only

# Dependency management
make composer-install  # Install PHP dependencies
make npm-install       # Install Node dependencies

# Development
make run               # Start application
make npm-dev           # Build assets for development
make npm-build         # Build assets for production

# Utilities
make storage-link      # Create storage symbolic link
make fresh             # Fresh install (migrations + seed)
🔧 Configuration
Environment Variables
Key variables in .env:
APP_NAME="Fanthom Store"
APP_URL=http://localhost

DB_CONNECTION=mysql
DB_HOST=mysql
DB_PORT=3306
DB_DATABASE=fanthom_store
DB_USERNAME=sail
DB_PASSWORD=password

VITE_APP_NAME="${APP_NAME}"
Docker Services
Configured in docker-compose.yml:
- Laravel Application: Port 80
- MySQL Database: Port 3306
- PhpMyAdmin: Port 8080
- Mailhog (if configured): Port 8025
🎨 Frontend Development
Tailwind CSS
Tailwind is configured and ready to use:
<div class="bg-blue-500 text-white p-4 rounded-lg">
  Styled with Tailwind
</div>
Alpine.js
Interactive components with Alpine:
<div x-data="{ open: false }">
  <button @click="open = !open">Toggle</button>
  <div x-show="open">Content</div>
</div>
Vite Build
# Development (with hot reload)
npm run dev

# Production build
npm run build
🐛 Troubleshooting
Common Issues
-
Docker not running
- Error: Cannot connect to Docker daemon
- Solution: Start Docker Desktop
-
Port already in use
- Error: Port 80/3306/8080 already allocated
- Solution: Change ports in
docker-compose.ymlor stop conflicting services
-
Permission denied (WSL)
- Error: Permission denied when running commands
- Solution: Ensure Docker Desktop WSL integration is enabled
-
Composer install fails
- Error: Dependencies cannot be resolved
- Solution: Update
composer.jsonor runcomposer update
-
Migration errors
- Error: Table already exists
- Solution: Run
make freshto reset database
Logs and Debugging
# View application logs
./vendor/bin/sail logs

# View specific service logs
./vendor/bin/sail logs mysql

# Enter container shell
./vendor/bin/sail shell

# Run artisan commands
./vendor/bin/sail artisan {command}
🚀 Deployment
Production Build
-
Build assets
npm run build -
Optimize autoloader
composer install --optimize-autoloader --no-dev -
Cache configuration
php artisan config:cache php artisan route:cache php artisan view:cache -
Set environment
APP_ENV=production
APP_DEBUG=false
Deployment Platforms
Compatible with:
- AWS EC2 / ECS
- DigitalOcean
- Heroku
- Laravel Forge
- Laravel Vapor
🤝 Contributing
This project is inspired by tokokita-laravel. Contributions, improvements, and suggestions are welcome!
📄 License
This project is open source and available for educational purposes.
🙏 Acknowledgments
- Inspired by tokokita-laravel by afifbasya
- Built with Laravel ecosystem tools
- Powered by Tailwind CSS and Alpine.js
Happy Shopping! 🛒✨